Installing Pluton PRO on Desktop
Pluton PRO can be installed on desktop operating systems including Windows 10/11, macOS, Ubuntu Desktop, Debian Desktop, and Fedora.
Pluton PRO stores sensitive setup data in protected local files with strict permissions instead of the OS credential manager.
Prerequisites
- A valid Pluton PRO license key
- Windows 10/11 (x64), macOS Monterey or later (arm64/x64), or Linux desktop (x64/arm64)
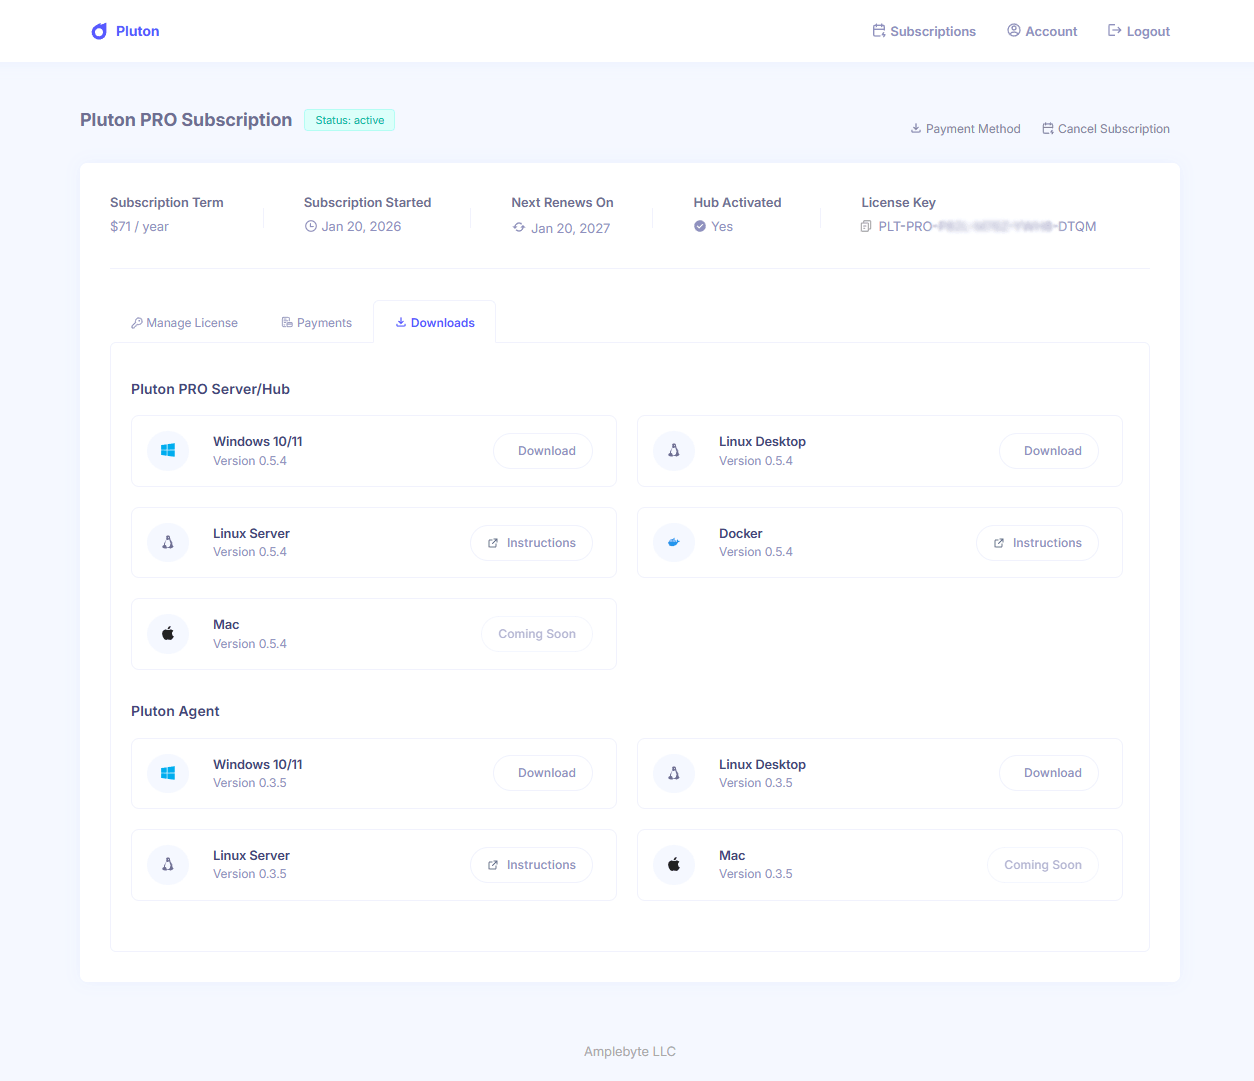
Download
Pluton PRO downloads require a valid license. You will receive download access after purchasing a license from the Pluton website. Then login to Pluton User Panel and click the subscription item and then click the Downloads tab to download the Installer for your preferred OS.
Installing on Windows
- Download the exe file from the Pluton User Panel.
- Run the installer.
- During installation, set the server port (default: 5173).
- After installation, open
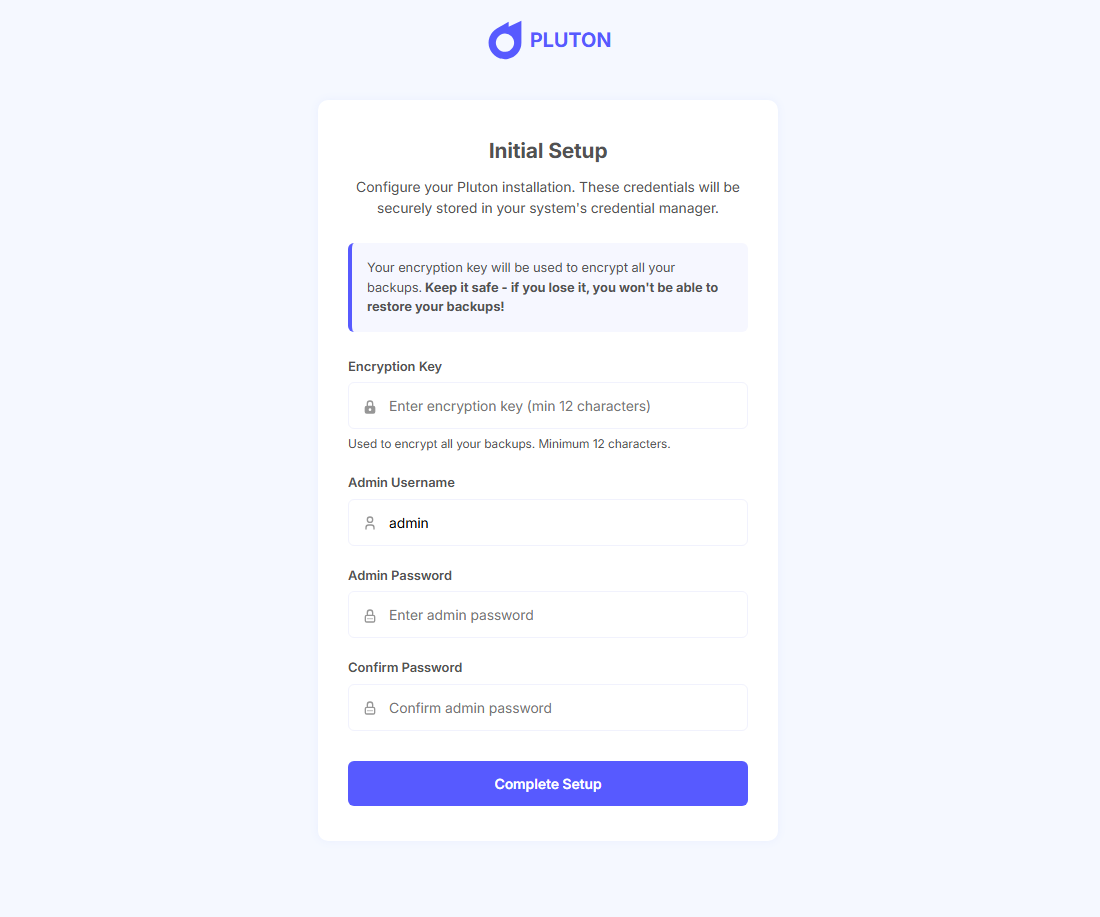
http://localhost:5173in your browser. - On first launch, complete the setup wizard:
- Enter your license key
- Set your encryption key (minimum 12 characters)
- Create your admin username and password
- After setup, log in with your admin credentials.
Important:
- Never lose your encryption key. It encrypts all your backups and cannot be recovered.
- The license key, encryption key, and credentials are stored in protected local files with strict permissions.
Files written on Windows:
| File | Description |
|---|---|
C:\ProgramData\Pluton\ | Primary data directory containing Pluton PRO's database, logs, backups, license state, and runtime data. |
C:\ProgramData\Pluton\pluton.enc.env | Stores the encryption key with restricted NTFS ACLs. |
C:\ProgramData\Pluton\config\config.json | Stores non-sensitive application settings such as the server port and backup concurrency. |
Installing on macOS
Pluton PRO is installed on macOS via Homebrew. It supports both Apple Silicon (arm64) and Intel (x86_64) Macs running macOS Monterey (12) or later.
- Add the Pluton Homebrew tap:
brew tap plutonhq/pluton
- Set your license key and install:
export HOMEBREW_PLUTON_PRO_LICENSE="YOUR_LICENSE_KEY"
brew install plutonhq/pluton/pluton-pro
- After installation, open
http://localhost:5173in your browser. - On first launch, complete the setup wizard:
- Enter your license key
- Set your encryption key (minimum 12 characters)
- Create your admin username and password
- After setup, log in with your admin credentials.
Important:
- Never lose your encryption key. It encrypts all your backups and cannot be recovered.
- The license key, encryption key, and credentials are stored in protected local files with strict permissions.
Files written on macOS:
| File | Description |
|---|---|
/var/lib/pluton/ | Primary data directory containing Pluton PRO's database, logs, backups, license state, and runtime data. |
/var/lib/pluton/pluton.enc.env | Stores the encryption key with restrictive file permissions. |
/var/lib/pluton/config/config.json | Stores non-sensitive application settings such as the server port and backup concurrency. |
To back up files in protected directories (Desktop, Documents, etc.), grant Full Disk Access to the Pluton binary:
System Settings → Privacy & Security → Full Disk Access → Click + and add /opt/pluton/pluton
You can press Cmd+Shift+G in the file picker dialog to type the path directly.
Installing on Linux Desktop
- Download the AppImage file for your architecture from Pluton User Panel.
- Open a terminal in the directory containing the AppImage and run:
sudo ./Pluton-PRO-x86_64.AppImage --install
- During installation, set the server port (default: 5173).
- After installation, open
http://localhost:5173in your browser. - On first launch, complete the setup wizard (screenshot above):
- Set your encryption key (minimum 12 characters)
- Create your admin username and password
- After setup, log in with your admin credentials.
The AppImage installer runs with sudo so it can install the service and helper binary. After installation, the Pluton PRO service runs as the dedicated non-root pluton system user.
Important:
- Never lose your encryption key. It encrypts all your backups and cannot be recovered.
- The license key, encryption key, and credentials are stored in protected local files with strict permissions.
Linux desktop installs use a least-privilege model:
- The systemd service runs as the
plutonuser and group, not as root. - Runtime data under
/var/lib/pluton/and sensitive environment files under/etc/pluton/are owned byplutonwith restrictive permissions. /usr/bin/pluton-helperis installed for narrow elevated operations such as privileged restores, root-approved hook scripts, and ReaR rescue backups.
If you store backups in a local mounted path, external drive, or another directory outside /var/lib/pluton, grant the pluton user write access to that destination:
sudo apt update && sudo apt install acl -y
sudo setfacl -R -m u:pluton:rwx,d:u:pluton:rwx /path/to/pluton-backups
Normal plan scripts run as the pluton user. If a script needs root privileges, enable root execution in the plan settings and allow only that script through sudoers:
sudo tee /etc/sudoers.d/pluton-helper-scripts >/dev/null <<'EOF'
pluton ALL=(root) NOPASSWD: /usr/bin/pluton-helper run-script /usr/local/libexec/pluton-hooks/pre-backup-root.sh
EOF
sudo chmod 440 /etc/sudoers.d/pluton-helper-scripts
sudo visudo -c -f /etc/sudoers.d/pluton-helper-scripts
Full Linux system backups use ReaR and require root access. Add these sudoers rules only on systems where you use bare-metal rescue backups:
sudo tee /etc/sudoers.d/pluton-helper-rear >/dev/null <<'EOF'
pluton ALL=(root) NOPASSWD: /usr/bin/pluton-helper run-rear mkbackup --config /var/lib/pluton/config/rear-config-*.conf --tmpdir *
pluton ALL=(root) NOPASSWD: /usr/bin/pluton-helper run-rear mkbackuponly --config /var/lib/pluton/config/rear-config-*.conf --tmpdir *
pluton ALL=(root) NOPASSWD: /usr/bin/pluton-helper run-rear checklayout --config /var/lib/pluton/config/rear-config-*.conf --tmpdir *
EOF
sudo chmod 440 /etc/sudoers.d/pluton-helper-rear
sudo visudo -c -f /etc/sudoers.d/pluton-helper-rear
Files written on Linux Desktop:
| File | Description |
|---|---|
/usr/bin/pluton-helper | Least-privilege helper for elevated Linux tasks |
/var/lib/pluton/ | Primary data directory containing Pluton PRO's database, logs, backups, license state, and runtime data. |
/etc/pluton/pluton.env | Stores the license key plus admin username and password with restrictive file permissions. |
/etc/pluton/pluton.enc.env | Stores the encryption key with restrictive file permissions. |
/var/lib/pluton/config/config.json | Stores non-sensitive application settings such as the server port and backup concurrency. |
Network Configuration
Pluton PRO requires two ports for full functionality:
| Port | Purpose |
|---|---|
| 5173 | Web interface (configurable during install) |
Updating
Windows
- Download the latest installer.
- Run the installer. Your configuration and data are preserved.
macOS
export HOMEBREW_PLUTON_PRO_LICENSE="YOUR_LICENSE_KEY"
brew update
brew upgrade pluton-pro
Your configuration and data are preserved during the update.
Linux Desktop
- Download the latest AppImage.
- Run the update command:
sudo ./Pluton-PRO-x86_64.AppImage --install
Your configuration and data are preserved during the update.
Uninstalling
Windows
- Navigate to
C:\Program Files\Pluton - Run
uninstall.exe
macOS
Stops the service and removes the LaunchDaemon, but preserves your data:
brew uninstall pluton-pro
To fully uninstall and remove all data:
brew uninstall --zap pluton-pro
Linux Desktop
Run the uninstall script:
sudo /opt/pluton/uninstall.sh
Upgrading from Pluton (Free)
If you have an existing Pluton installation and want to upgrade to Pluton PRO, see Upgrading to Pluton PRO.