Connecting PikPak
This guide walks you through connecting a PikPak storage destination to Pluton.
Prerequisites
Before connecting PikPak, you need:
- A PikPak account - Sign up here
- Your PikPak username and password
About PikPak
PikPak is a private cloud drive service that provides fast file storage and downloading capabilities. It supports modification times and MD5 hashes for reliable change detection. Pluton connects to PikPak using your account username and password.
Getting Your Credentials
Step 1: Note Your Credentials
- Your Username is the email, phone number, or username you use to log into PikPak
- Your Password is your PikPak account password
No additional API keys or tokens are needed — PikPak uses direct username/password authentication.
Connecting to Pluton
Step 1: Add Storage
- In Pluton, navigate to Storages
- Click Add Storage button
- Select PikPak from the provider list
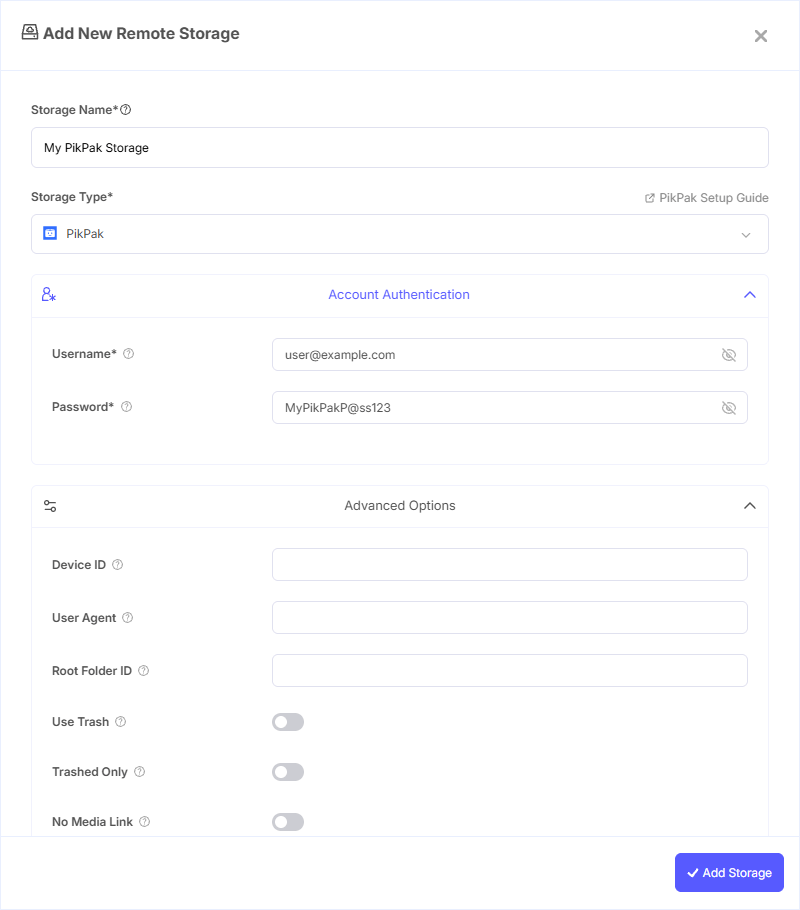
Step 2: Configure Connection
Fill in the required fields:
- Storage Name: A friendly name (e.g., "PikPak Backups")
- Username: Your PikPak account username
- Password: Your PikPak account password
Step 3: Advanced Options (Optional)
Additional settings available:
- Root Folder ID: Specify a folder ID to use as the root. Leave blank to use the top-level root folder. Fill in to start from a non-root folder
- Use Trash: Send deleted files to the trash instead of permanently deleting them (enabled by default)
- Trashed Only: Only show files that are in the trash, displayed in their original directory structure (disabled by default)
- Hash Memory Limit: Files larger than this are cached on disk for hash calculation (default: 10 MiB)
- Chunk Size: Chunk size for multipart uploads (default: 5 MiB). Large files are uploaded in chunks of this size
- Upload Concurrency: Number of chunks uploaded concurrently for multipart uploads (default: 5)
- No Media Link: Use original file links instead of media links. This avoids issues caused by invalid media links but may reduce download speeds (disabled by default)
- Device ID: Custom device ID used for authorization. Leave blank to use the auto-generated default
- User Agent: Custom HTTP user agent string for PikPak API requests
Step 4: Complete the Storage Setup
- Click the Add Storage button which automatically verifies credentials and adds the storage.*
- Your PikPak storage is now ready for backup plans
Common Issues
Authentication Failed: Double-check your username and password. Ensure you are using the correct credentials for your PikPak account.
Slow Downloads: If downloads are slow, try enabling the No Media Link option. Media links may sometimes be invalid or slower than original file links.
Upload Failures for Large Files: Adjust the Chunk Size and Upload Concurrency settings. Reducing concurrency can help on unstable connections, while increasing chunk size can improve throughput on fast connections.
Device Authorization Issues: If you encounter device-related authentication errors, try clearing the Device ID field to generate a new device identifier.
File System Features
Modification Times: PikPak tracks file modification times, enabling efficient incremental backup detection.
MD5 Hashes: PikPak supports MD5 checksums for data integrity verification.
Trash Support: By default, deleted files are moved to the trash and can be recovered. Disable Use Trash to permanently delete files immediately.
Best Practices
- Keep Use Trash enabled (default) so accidentally deleted files can be recovered
- PikPak's support for modification times and MD5 hashes ensures reliable incremental backup detection
- For unstable network connections, reduce Upload Concurrency to avoid failed chunk uploads
- Use a specific Root Folder ID to organize backups into a dedicated folder
- Monitor your PikPak storage quota to prevent backup failures