Connecting Google Photos
This guide walks you through connecting a Google Photos storage destination to Pluton.
Prerequisites
Before connecting Google Photos, you need:
- A Google account with Google Photos - Sign up here
- A Google Cloud project with the Photos Library API enabled
- OAuth 2.0 Client ID and Client Secret
The Google Photos API has significant limitations. As of March 31, 2025, rclone can only download photos and videos that it uploaded. Photos uploaded through other means (phone, web, etc.) cannot be downloaded via the API. Please ensure this meets your use case before configuring.
Getting Your Credentials
Step 1: Create a Google Cloud Project
- Go to the Google Cloud Console
- Click Select a project → New Project
- Enter a project name (e.g., "Pluton Photos") and click Create
Step 2: Enable the Photos Library API
- In your project, go to APIs & Services → Library
- Search for Photos Library API
- Click on it and then click Enable
Step 3: Configure OAuth Consent Screen
- Go to APIs & Services → OAuth consent screen
- Select External user type and click Create
- Fill in the required fields (App name, User support email, Developer contact)
- Under Scopes, add the Google Photos Library API scopes
- Under Test users, add your Google account email
- Complete the setup
Step 4: Create OAuth Credentials
- Go to APIs & Services → Credentials
- Click Create Credentials → OAuth client ID
- Select Desktop app as the application type
- Click Create and copy the Client ID and Client Secret
Step 5: Generate an OAuth Token
Since Pluton runs on a server that may not have a web browser, you need to generate an OAuth token using rclone authorize:
- Install rclone on a machine with a web browser
- Run the following command:
rclone authorize "google photos" "your_client_id" "your_client_secret" - A browser window will open — log in with your Google account and grant access
- Copy the JSON token blob printed to the terminal
Connecting to Pluton
Step 1: Add Storage
- In Pluton, navigate to Storages
- Click Add Storage button
- Select Google Photos from the provider list
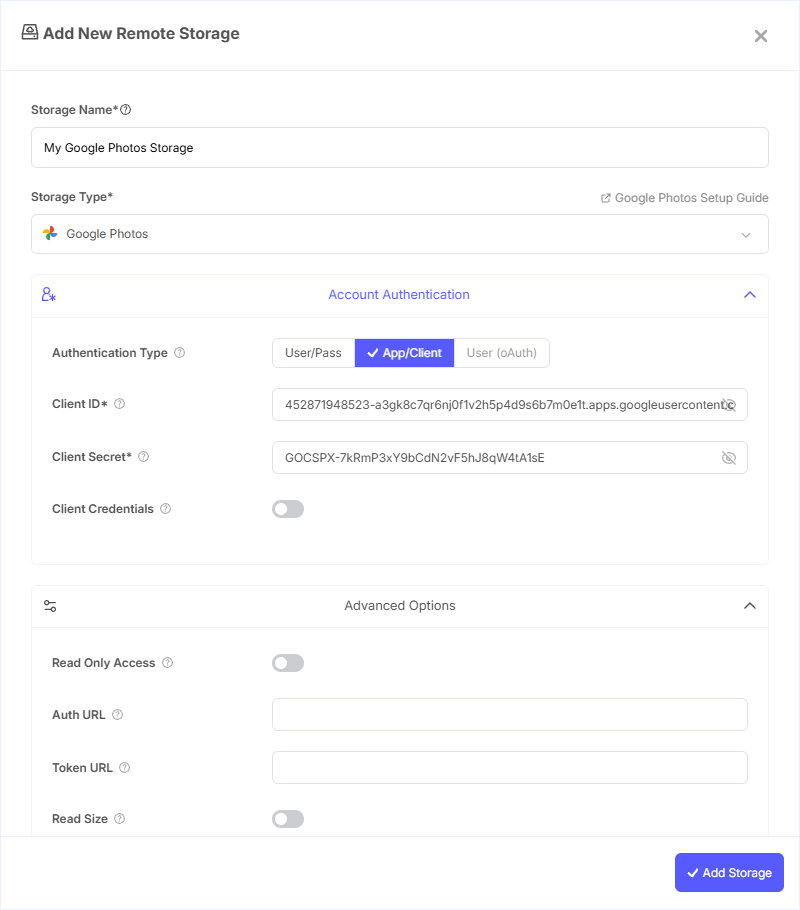
Step 2: Configure Connection
Fill in the required fields:
- Storage Name: A friendly name (e.g., "Google Photos Backup")
- Client ID: Your Google OAuth Client ID
- Client Secret: Your Google OAuth Client Secret
- OAuth Access Token: Paste the JSON token blob obtained from
rclone authorize
Step 3: Advanced Options (Optional)
Additional settings available:
- Read Only Access: Enable to restrict to read-only mode where only viewing and downloading photos is allowed. Recommended if you only need to back up existing photos
- Start Year: Limit downloads to photos uploaded after the given year (default: 2000)
- Include Archived: Also view and download archived media. By default, archived media is hidden from listings
- Read Size: Adds an extra API request per file to read the size of media items. May be needed for some advanced operations
- Batch Mode: Upload file batching mode:
- Sync — Batch uploads and check completion (default)
- Async — Batch uploads without completion check
- Off — No batching, upload files individually
- Batch Size: Maximum number of files in an upload batch (must be less than 50)
- Batch Timeout: Maximum idle time before an upload batch is submitted
- Proxy: Proxy URL for downloading full-resolution images. Without a proxy, Google may deliver lower-resolution images with missing EXIF data
Step 4: Complete the Storage Setup
- Click the Add Storage button which automatically verifies credentials and adds the storage.
- Your Google Photos storage is now ready for backup plans
Common Issues
Cannot Download Existing Photos: As of March 2025, the Google Photos API only allows downloading photos that were uploaded through the same API connection. Photos uploaded via the Google Photos app or website cannot be downloaded. This is a Google policy limitation, not a Pluton issue.
Token Expired: Re-run rclone authorize "google photos" with your Client ID and Client Secret to generate a fresh token.
Low-Resolution Downloads: If images are being downloaded at reduced resolution with missing EXIF data, configure a Proxy URL in the advanced options.
OAuth Consent Screen in Testing Mode: If your Google Cloud project is in "Testing" mode, tokens expire after 7 days. Submit your app for verification or re-authorize periodically.
Upload Errors with Batching: If you encounter upload errors, try changing Batch Mode to "Off" to isolate the issue, or reduce the Batch Size.
Best Practices
- Enable Read Only Access if you only need to download/back up photos and won't be uploading
- Set a Start Year to limit the scope of downloads if you have a very large photo library
- Use Sync batch mode for the best balance of speed and reliability when uploading
- Be aware of Google Photos API quotas — high-frequency operations may hit rate limits
- Consider using Google Drive instead if you need to back up all photos regardless of upload source
- Regularly refresh your OAuth token to prevent authentication failures