Connecting Microsoft Azure Blob Storage
This guide walks you through connecting a Microsoft Azure Blob Storage destination to Pluton.
Prerequisites
Before connecting Azure Blob Storage, you need:
- A Microsoft Azure account - Sign up here
- A Storage Account created in the Azure Portal
- One of the following authentication methods:
- Storage Account Key (simplest)
- SAS URL for container-level access
- Service Principal credentials (Tenant ID, Client ID, Client Secret)
Getting Your Credentials
Option A: Storage Account Key (Recommended)
- Log into the Azure Portal
- Navigate to Storage accounts and select your storage account
- In the left menu, under Security + networking, click Access keys
- Click Show next to key1 or key2
- Copy the Storage account name and Key value
Option B: SAS URL
- In the Azure Portal, navigate to your Storage Account
- Under Security + networking, click Shared access signature
- Configure the allowed services (select Blob), resource types, and permissions (Read, Write, Delete, List)
- Set an appropriate expiry date
- Click Generate SAS and connection string
- Copy the Blob service SAS URL
Option C: Service Principal (Azure AD)
- In the Azure Portal, go to Microsoft Entra ID → App registrations
- Click New registration, name it (e.g., "Pluton Backup"), and register
- Note the Application (client) ID and Directory (tenant) ID
- Under Certificates & secrets, create a new Client secret and copy its value
- Assign the service principal the Storage Blob Data Contributor role on your storage account
Connecting to Pluton
Step 1: Add Storage
- In Pluton, navigate to Storages
- Click Add Storage button
- Select Microsoft Azure Blob Storage from the provider list
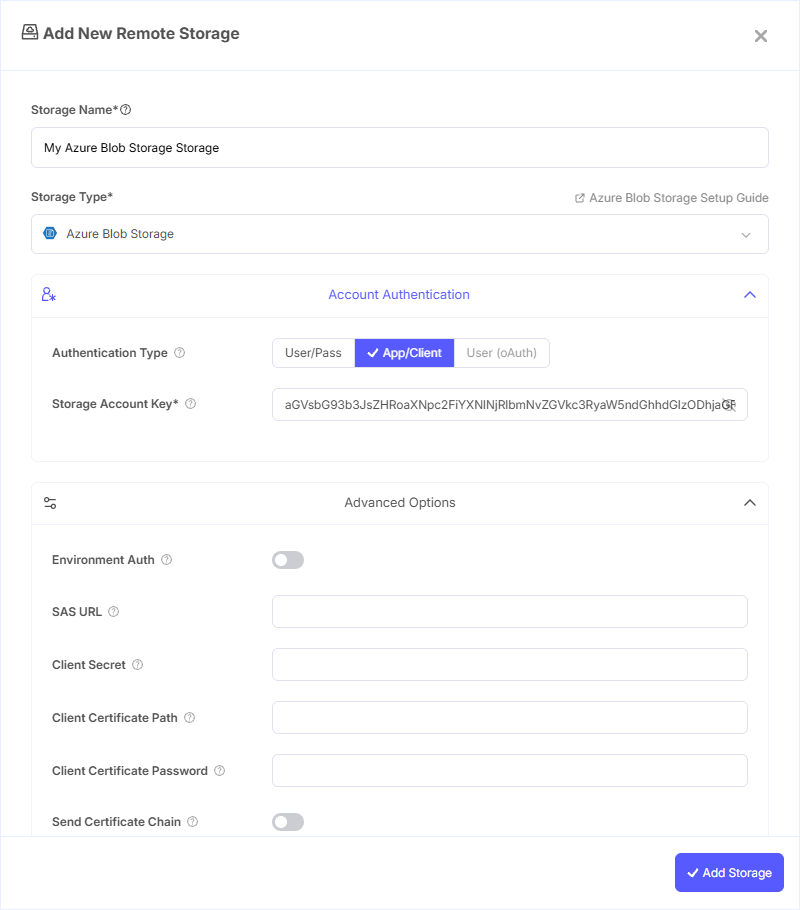
Step 2: Configure Connection
Using Storage Account Key
Fill in the required fields:
- Storage Name: A friendly name (e.g., "Azure Blob Backups")
- Storage Account Name: Your Azure Storage Account Name
- Storage Account Key: Your account's shared access key
Using SAS URL
- Storage Name: A friendly name (e.g., "Azure Blob SAS")
- Storage Account Name: Your Azure Storage Account Name
- SAS URL: The SAS URL for container-level access. Leave Storage Account Key blank when using this method
Using Service Principal
- Storage Name: A friendly name (e.g., "Azure Blob SP")
- Storage Account Name: Your Azure Storage Account Name
- Tenant ID: The directory ID of the service principal's tenant
- Client ID: The application (client) ID
- Client Secret: One of the service principal's client secrets
Step 3: Advanced Options (Optional)
Additional settings available:
- Environment Auth: Read credentials from runtime environment variables, CLI, or MSI instead of entering them manually
- Use MSI: Use a Managed Service Identity to authenticate (only works when running inside Azure)
- MSI Object ID: Object ID of the user-assigned MSI
- MSI Client ID: Client ID of the user-assigned MSI
- MSI Resource ID: Azure resource ID of the user-assigned MSI
- Client Certificate Path: Path to a PEM or PKCS12 certificate file for certificate-based authentication
- Client Certificate Password: Password for the certificate file (if applicable)
- Use Azure CLI: Use the Azure CLI (
az) tool as the sole means of authentication - Username / Password: User credentials for Azure AD authentication
- Service Principal File: Path to a file containing service principal credentials
- Use Emulator: Connect to a local Azure Storage Emulator instead of the real service
- Endpoint: Custom endpoint for the service (leave blank for standard Azure)
- Access Tier: Set the blob access tier — Hot, Cool, Cold, or Archive
- Chunk Size: Upload chunk size (default: 4 MiB). Chunks are stored in memory during upload
- Upload Concurrency: Number of chunks uploaded concurrently (default: 16)
- List Chunk: Number of blobs per listing page (default: 5000)
- Public Access: Set public access level for containers (blob-level or full container)
- Disable Checksum: Skip MD5 checksum storage for faster uploads
- Archive Tier Delete: Delete archive tier blobs before overwriting (archive blobs cannot be updated directly)
- No Check Container: Skip container existence checks to reduce API calls
Step 4: Complete the Storage Setup
- Click the Add Storage button which automatically verifies credentials and adds the storage.
- Your Azure Blob Storage is now ready for backup plans
Common Issues
Authentication Failed: Verify your Storage Account Name and Key are correct. If using a SAS URL, ensure it has not expired and includes the necessary permissions (Read, Write, Delete, List).
Container Not Found: Confirm the container exists in your Storage Account. You can create containers from the Azure Portal under Data storage → Containers.
Forbidden (403): When using a Service Principal, ensure the Storage Blob Data Contributor role is assigned on the storage account. Role assignments can take a few minutes to propagate.
SAS URL Expired: Generate a new SAS URL with a longer expiry period from the Azure Portal.
Archive Tier Blobs Cannot Be Modified: If you encounter errors updating archived blobs, enable the Archive Tier Delete option to delete them before overwriting.
Best Practices
- Use Storage Account Keys for simple setups; use Service Principals for enterprise environments with Azure AD
- Set an appropriate Access Tier (Hot for frequently accessed backups, Cool or Cold for long-term retention)
- Enable Disable Checksum only if upload speed is critical and data integrity is verified elsewhere
- Store your Storage Account Key securely — rotate keys periodically via the Azure Portal
- Use separate containers for different backup plans for easier management
- Consider using Cool or Archive tiers for infrequently accessed backup data to reduce costs