Connecting Nextcloud
This guide walks you through connecting a Nextcloud instance to Pluton for backing up your files. Nextcloud is a popular self-hosted file sync and collaboration platform with full WebDAV support. Pluton connects to Nextcloud via the WebDAV protocol, giving you incremental backups of your Nextcloud files.
Prerequisites
Before connecting Nextcloud, you need:
- A Nextcloud instance (self-hosted or managed)
- Your Nextcloud username and password (or an app password if 2FA is enabled)
Getting Your Nextcloud WebDAV URL
Your Nextcloud WebDAV URL follows this format:
https://your-nextcloud-server.com/remote.php/webdav/
To find it in Nextcloud:
- Log into your Nextcloud instance
- Click on Files in the top navigation
- Click the Settings cog icon in the bottom-left corner
- Copy the WebDAV URL shown there
Generating an App Password (If Using 2FA)
If you have two-factor authentication enabled on your Nextcloud account:
- Log into Nextcloud and go to Settings → Security
- Scroll down to Devices & sessions
- Enter a name for the app (e.g., "Pluton Backup") and click Create new app password
- Copy the generated app password — you'll use it as the Password in Pluton
Even without 2FA, using an app password is recommended. It can be revoked independently without changing your main account password.
Connecting to Pluton
Step 1: Add Storage
- In Pluton, navigate to Storages
- Click Add Storage button
- Select WebDAV from the provider list
Step 2: Configure Connection
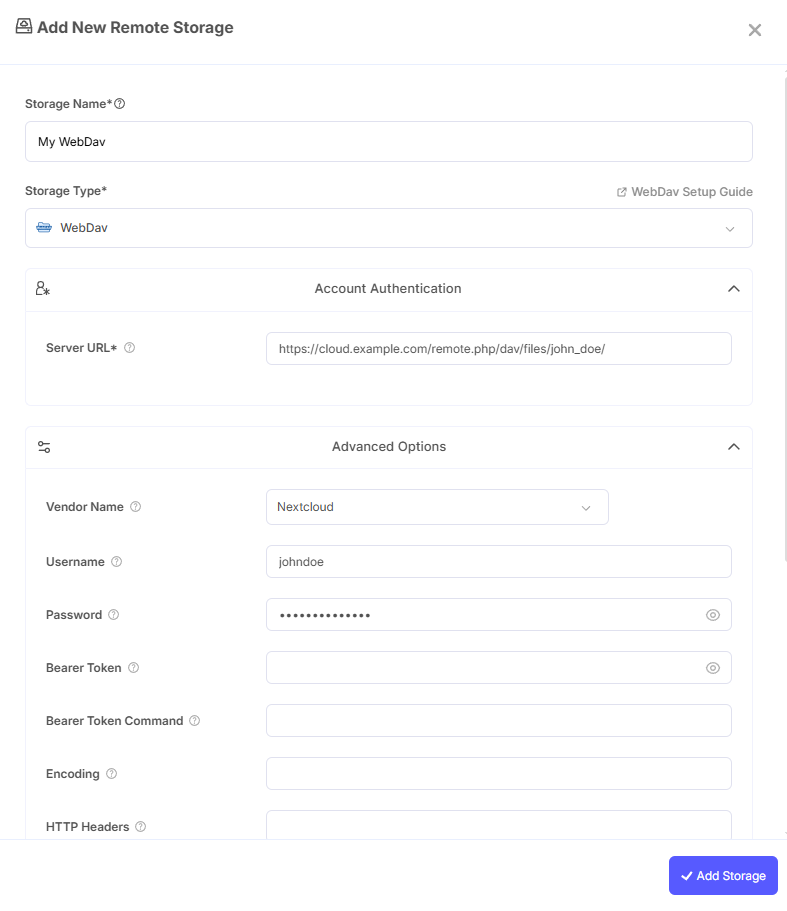
Fill in the required fields:
- Storage Name: A friendly name (e.g., "Nextcloud Backups")
- Server URL: Your Nextcloud WebDAV URL (e.g.,
https://your-nextcloud-server.com/remote.php/webdav/) - Vendor Name: Set to
nextcloud - Username: Your Nextcloud username
- Password: Your Nextcloud password (or app password if 2FA is enabled)
Step 3: Advanced Options (Optional)
Additional settings available:
- NextCloud Chunk Size: Controls the upload chunk size (default:
10Mi). For better performance with large files, consider increasing this — Nextcloud recommends configuring your server to support up to 1 GB chunks. See the Nextcloud documentation for details. - Bearer Token: Use a bearer token for authentication instead of username/password
- Encoding: Override the default backend encoding
- HTTP Headers: Set custom HTTP headers for all transactions
- Pacer Min Sleep: Minimum time to sleep between API calls (default:
10ms)
Step 4: Test and Save
- Click Test Connection to verify your credentials and server URL
- If successful, click Save
- Your Nextcloud storage is now ready for backup plans
Nextcloud supports modified timestamps and file hashes (SHA1 and MD5), which improves backup efficiency and integrity verification compared to plain WebDAV servers.
Common Issues
Connection Refused or Timeout: Verify your Server URL is correct and includes the full path /remote.php/webdav/. Ensure the Nextcloud server is reachable from the machine running Pluton.
Authentication Failure: Double-check your username and password. If your Nextcloud account uses 2FA, you must use an app password — your regular password will not work.
SSL/TLS Errors: Ensure your Nextcloud instance has a valid SSL certificate. Self-signed certificates may cause connection failures.
Slow Uploads: If uploads are slow, try increasing the NextCloud Chunk Size setting and configuring your Nextcloud server to support larger chunks.
Best Practices
- Always use HTTPS to encrypt data in transit
- Use app passwords instead of your main account password
- Set the Vendor Name to
nextcloudto enable Nextcloud-specific optimizations - Increase the chunk size for better upload performance with large backup sets
- Regularly verify your app password hasn't been revoked
- Monitor your Nextcloud storage quota to ensure there is enough space for backups