Connecting OpenStack Swift
This guide walks you through connecting an OpenStack Swift (Object Storage) destination to Pluton.
Prerequisites
Before connecting OpenStack Swift, you need:
- An account with an OpenStack Swift-compatible provider, such as:
- Rackspace Cloud Files
- OVH Object Storage
- Memset Memstore
- Blomp Cloud Storage
- A self-hosted OpenStack deployment
- Your authentication credentials (username, password/API key, and auth URL)
- Your tenant (project) name or ID
Getting Your Credentials
Step 1: Identify Your Auth URL
Your authentication URL depends on your provider and authentication version:
| Provider | Auth URL |
|---|---|
| Rackspace US | https://auth.api.rackspacecloud.com/v1.0 |
| Rackspace UK | https://lon.auth.api.rackspacecloud.com/v1.0 |
| Rackspace v2 | https://identity.api.rackspacecloud.com/v2.0 |
| Memset Memstore UK | https://auth.storage.memset.com/v1.0 |
| Memset Memstore UK v2 | https://auth.storage.memset.com/v2.0 |
| OVH | https://auth.cloud.ovh.net/v3 |
| Blomp Cloud Storage | https://authenticate.ain.net |
For self-hosted OpenStack deployments, consult your administrator for the Keystone auth URL (typically ending in /v2.0 or /v3).
Step 2: Gather Your Credentials
- Log into your OpenStack dashboard (Horizon) or provider console
- Note your Username and Password (or API Key)
- Note your Tenant Name (also called Project Name) — found in the project dropdown or API access page
- If using v3 authentication, also note your User Domain and Tenant Domain
Step 3: Create a Container (Optional)
You can create a container in advance through Horizon or the Swift CLI, or let Pluton create one when configuring a backup plan:
swift post pluton-backups
Connecting to Pluton
Step 1: Add Storage
- In Pluton, navigate to Storages
- Click Add Storage button
- Select OpenStack Swift from the provider list
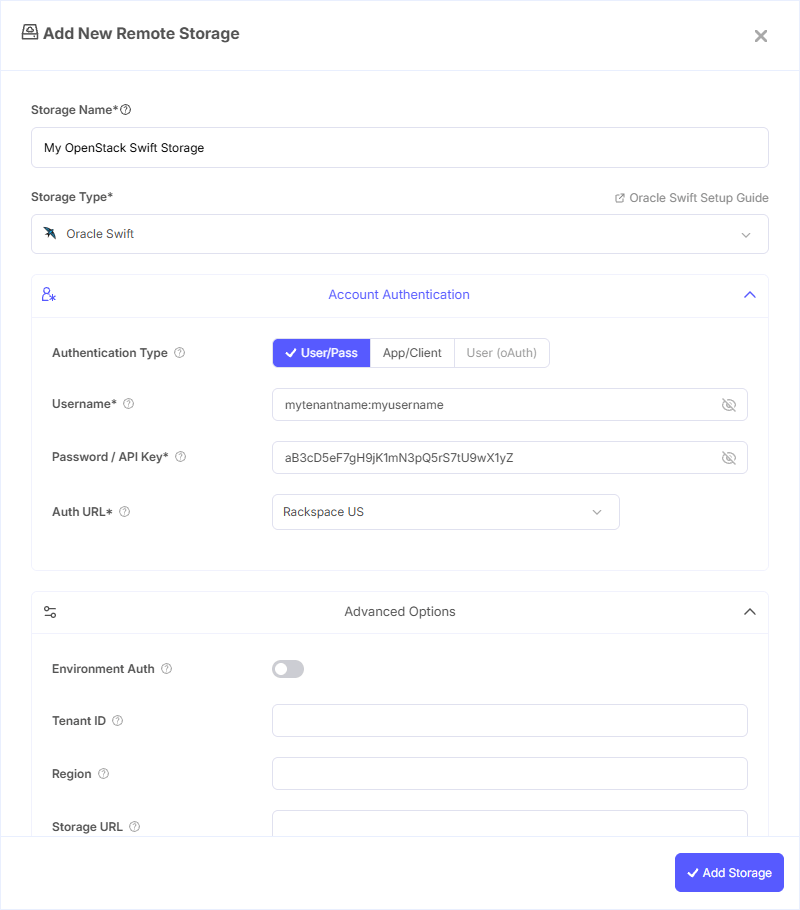
Step 2: Configure Connection
Fill in the required fields:
- Storage Name: A friendly name (e.g., "Swift Production Backups")
- Username: Your OpenStack user name to log in
- Password / API Key: Your API key or password
- Auth URL: Select your provider from the dropdown list (Rackspace US, Rackspace UK, OVH, Memset, Blomp, etc.) or choose Custom and enter your own auth URL
- Tenant Name: Your tenant (project) name. Optional for v1 auth; required for v2/v3
Step 3: Additional Authentication Fields (Optional)
Depending on your authentication version and provider, you may need these additional fields:
- Environment Auth: Get Swift credentials from environment variables in standard OpenStack form (e.g.,
OS_USERNAME,OS_PASSWORD,OS_AUTH_URL) - User ID: User ID to log in. Optional — most systems use Username instead. Only used with v3 authentication
- User Domain: User domain, only used with v3 authentication
- Tenant ID: Tenant (project) ID. Alternative to Tenant Name for v2/v3 auth
- Tenant Domain: Tenant domain, only used with v3 authentication
- Region: Region name (e.g.,
RegionOne,SBG,GRA) - Storage URL: Direct storage URL (overrides the one from the service catalog)
- Auth Token: Auth token from alternate authentication
Application Credential Authentication (v3 only):
-
Application Credential ID: Application credential ID
-
Application Credential Name: Application credential name
-
Application Credential Secret: Application credential secret
-
Auth Version: Set to 1, 2, or 3 if your Auth URL has no version specified. Leave as 0 for auto-detection
Step 4: Advanced Options (Optional)
Additional settings available:
- Endpoint Type: Choose from Public (default), Internal, or Admin endpoints from the service catalog
- Storage Policy: Select a storage policy when creating new containers (e.g., OVH Public Cloud Storage
pcs, OVH Public Cloud Archivepca, or a custom value) - Chunk Size: Files above this size will be chunked into segments (default: 5 GiB, which is also the maximum)
- No Chunk: Disable chunking files during streaming upload
- No Large Objects: Disable support for static and dynamic large objects (limits uploads to 5 GiB max)
- Use Segments Container: Choose destination for large object segments
- Leave Parts On Error: Avoid aborting uploads on failure to allow resuming across sessions
- Fetch Until Empty Page: When paginating, always fetch unless an empty page is received
- Partial Page Fetch Threshold: Threshold percentage for when to fetch additional pages during pagination
Step 5: Complete the Storage Setup
- Click the Add Storage button which automatically verifies credentials and adds the storage.
- Your OpenStack Swift storage is now ready for backup plans
Common Issues
Authentication Failed: Verify your Username, Password/API Key, and Auth URL are correct. Ensure you are using the right authentication version for your provider.
Tenant Not Found: Make sure the Tenant Name or Tenant ID matches exactly what is shown in your OpenStack dashboard. For v2/v3 authentication, at least one is required.
Region Errors: If your provider has multiple regions, specify the correct Region value. Leaving it blank uses the default region.
Large File Upload Failures: Swift cannot transparently store files larger than 5 GiB. Ensure Chunk Size is set appropriately (default: 5 GiB) and No Large Objects is not enabled if you need large file support.
v3 Authentication Issues: For Keystone v3, ensure you provide User Domain and Tenant Domain in addition to the standard credentials. Alternatively, use Application Credential authentication.
Best Practices
- Use v3 authentication (Keystone) when available for improved security and domain support
- Select an Endpoint Type of Internal when the Pluton server is in the same network as the Swift cluster to avoid egress charges
- Set an appropriate Storage Policy based on your provider's offerings (e.g.,
pcafor archival on OVH) - Use Application Credential authentication for service accounts — it avoids exposing your main password
- Create dedicated containers for Pluton backups for easier lifecycle management
- Monitor container usage through your provider's dashboard or the Swift CLI